No. 020
How to Draw a Skull: Simple Steps From Shapes to Shading
The easiest way to draw a skull is to build it from simple shapes. Lightly draw a circle or oval for the cranium, add a vertical center line and a few horizontal guides, then attach the jaw underneath. Block in two large eye sockets, a triangular nasal opening, the cheekbones and a curved block for the teeth. Finish by darkening the hollows and adding simple shadows under the cheekbones and jaw. That sequence follows the construction taught by Ethan Nguyen at My Drawing Tutorials and by Fine Art Tutorials, and it works whether the skull is headed for an art class sketchbook, a tattoo idea, a sticker or a Día de Muertos decoration.
The rest of this page walks through each stage slowly: what to have on the table, the order of the shapes, the proportions that make a skull look like a skull, how to turn it to the side, how to shade it, and how to simplify it into a cartoon, a sugar skull or a piece of tattoo flash.
What you need on the table
You do not need a special kit. Plain paper, a light or medium graphite pencil, an eraser and, if you like, something to blend with will carry you all the way to a finished drawing.
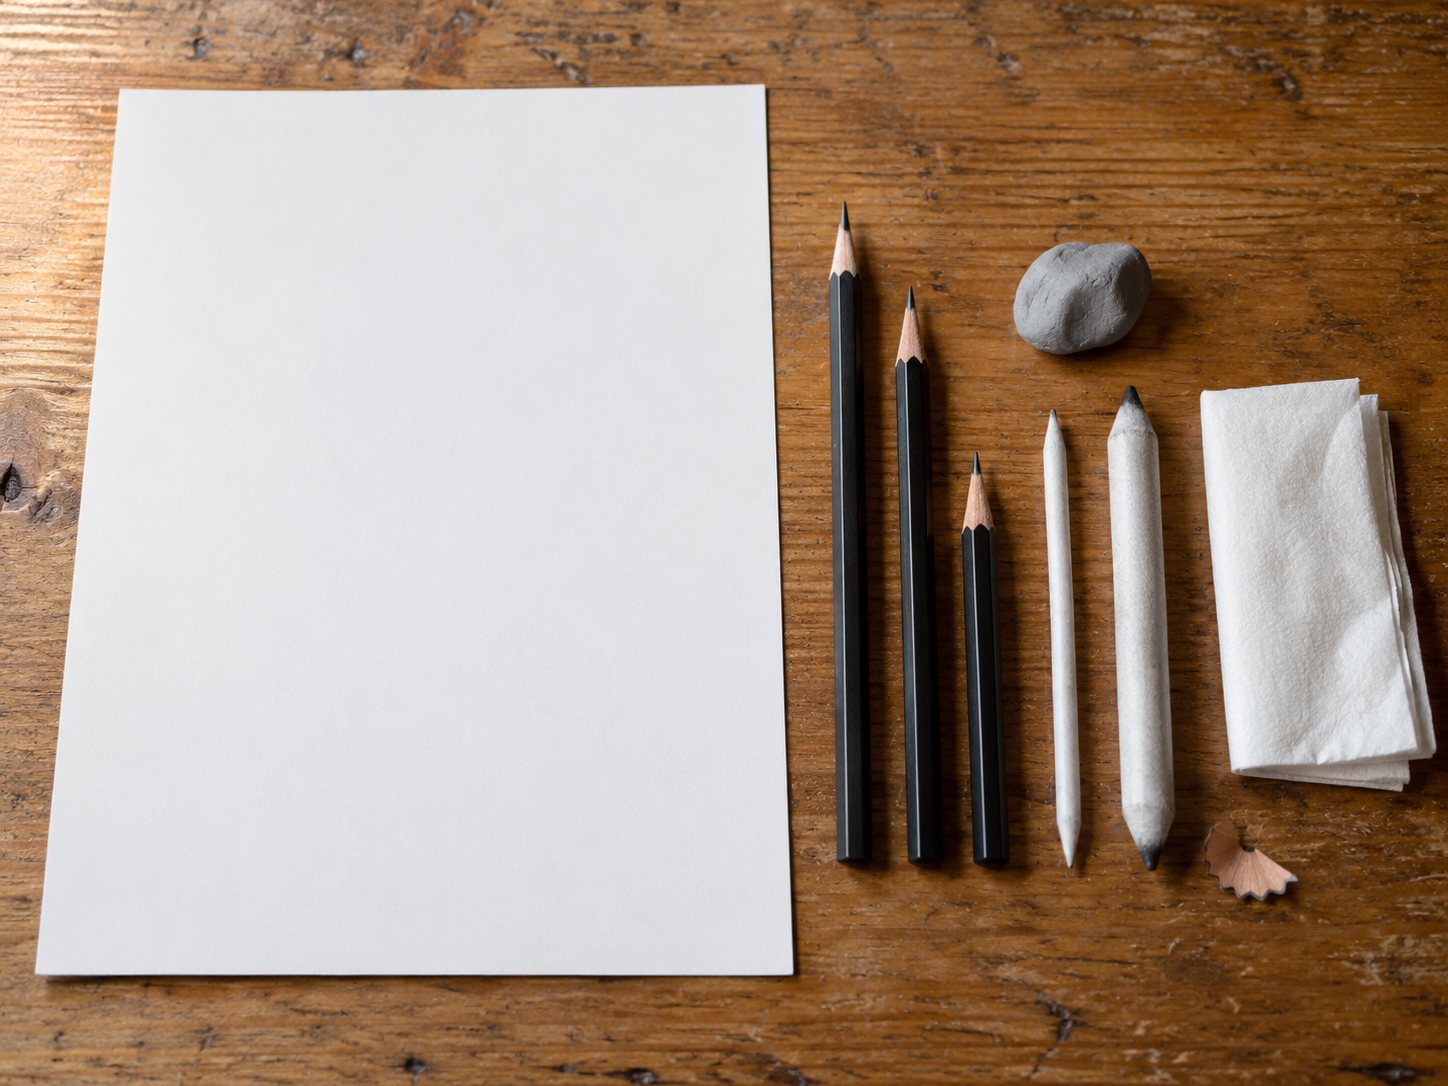
The two instructors behind these steps use slightly different setups, and either one is a good model. Ethan Nguyen's worked example uses a 2B pencil for the dark areas, a 2H pencil for the halftones, a tortillion and tissue paper for blending, and a sharpened 2B for cross-hatching. Fine Art Tutorials keeps it simpler with a pencil, a blending stump and a kneaded eraser.
Tap or hover a row to highlight it.
| Instructor | Pencils | Blending | Eraser |
|---|---|---|---|
| InstructorEthan Nguyen (My Drawing Tutorials) | Pencils2B for darks, 2H for halftones, sharpened 2B for cross-hatching | BlendingTortillion and tissue paper | EraserNot specified |
| InstructorFine Art Tutorials | PencilsA pencil | BlendingBlending stump | EraserKneaded eraser |
| InstructorSimple beginner setup | PencilsOne light or medium graphite pencil | BlendingOptional | EraserAny eraser |
In Nguyen's setup the harder 2H handles the lighter halftones and the softer 2B goes to the darkest areas, the hollows that give a skull its depth.
Step by step, from a circle to a skull
Every stage below builds on the one before it, so keep your lines light until the shapes are in the right place. Pressing hard on construction lines is one of the first habits both instructors warn against, because those lines are meant to disappear.
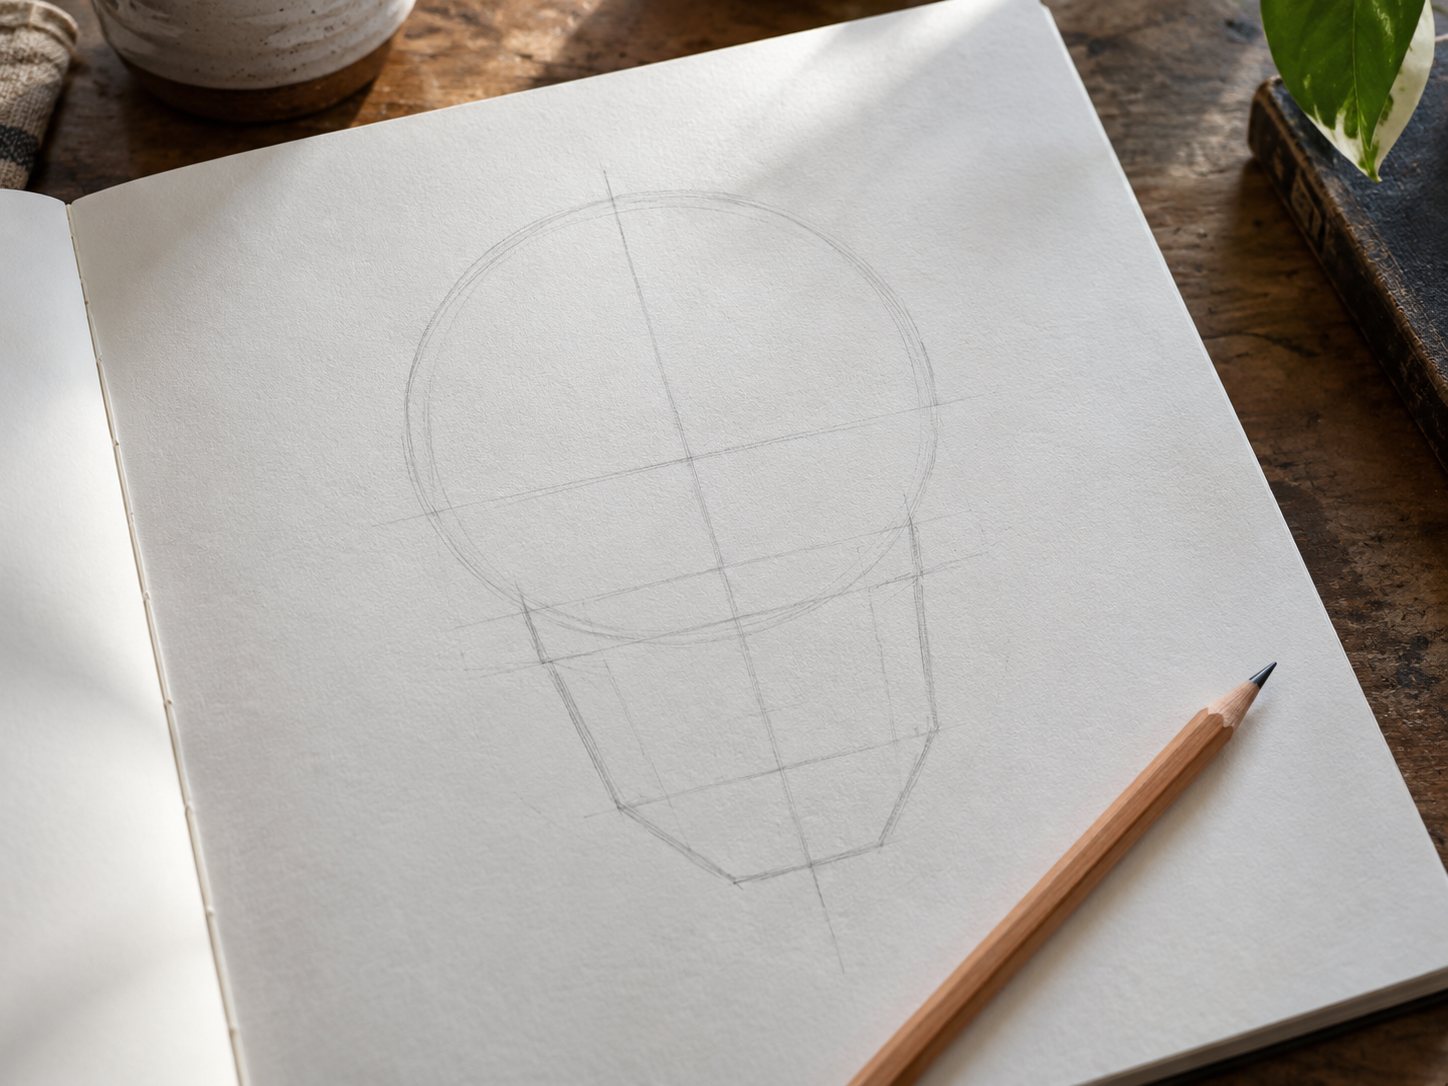
- Draw the cranium as a circle or oval. This big rounded shape is the cranium, the top and back of the skull.
- Add a vertical center line. It runs down the middle of the face and keeps the left and right sides matched.
- Add horizontal guides. Mark where the eye sockets, the nasal opening, the mouth and the bottom of the jaw will sit.
- Attach the jaw. Hang the lower jaw from the cranium so it connects the cheek area to the chin.
- Block in the eye sockets, nasal opening and cheekbones. Keep these as simple shapes for now.
- Draw the teeth as one curved block. Only after the block sits right do you divide it into single teeth.
- Pick one light source. Decide which side the light comes from before you shade anything.
- Darken the hollows and shade the rounded surfaces. The eye sockets and nasal opening go darkest; the curved bone gets softer halftones.
- Erase or lighten the construction lines. What remains should read as a skull, not as a diagram.
Skull construction checklist
Tap a card to bring it forward.
- Cranium circle or oval: Sets the size and the rounded mass of the whole skull
- Vertical center line: Keeps the two halves of the face matched
- Horizontal guides: Place the sockets, nasal cavity, mouth and jaw at the right heights
- Attach the mandible: Connects the cheekbones to the chin so the face has a base
- Sockets, nasal opening, cheekbones: Blocks in the main features before any detail
- Tooth mass first: The curved group decides spacing before single teeth
- One light source: Keeps every shadow consistent
- Darken cavities, add halftones: Gives the hollows depth and the bone a rounded feel
- Erase construction lines: Leaves a clean finished drawing
Ethan Nguyen's own order runs from the circle to a center line, brow line, facial plane, nose, jaw, cheekbones, mouth, eye sockets and teeth. Fine Art Tutorials adds the facial projection and the outer contour of the cranium along the way. The details differ, but both move from big simple shapes to small specific ones, and that habit matters more than the exact order.
The anatomy names that help
You can draw a skull without learning any Latin, but a few real names make tutorials and reference books much easier to follow. The eye sockets are called the orbits. The nasal opening is the nasal aperture. The cheekbones are the zygomatic bones, and the lower jaw is the mandible.
Tap or hover a row to highlight it.
| What you are drawing | Anatomy name |
|---|---|
| What you are drawingEye sockets | Anatomy nameOrbits |
| What you are drawingNasal opening | Anatomy nameNasal aperture |
| What you are drawingCheekbones | Anatomy nameZygomatic bones |
| What you are drawingLower jaw | Anatomy nameMandible |
| What you are drawingRounded top and back of the skull | Anatomy nameCranium |
Fine Art Tutorials also points out that the adult human skull is made of 22 bones connected by seams called sutures, with the mandible as the separate piece that moves. That is why the jaw gets its own step in the construction: it is a different bone hanging from the rest. For more on the bones themselves, the story of how many bones are in the human body and our collection of human skull facts show where the skull fits in the whole skeleton.
Proportions that make it look right
A skull drawing can have every feature in it and still look wrong if the spacing is off. Fine Art Tutorials gives a few relationships that keep things in check.
The guide line for the eye sockets runs through the middle of the construction circles, with the nasal cavity below the sockets and the jaw below that. Seen from the front, the face divides into rough thirds: upper forehead to brow, brow to nasal cavity, and nasal cavity to jaw. The eye sockets are large, symmetrical, rounded but slightly angular openings. Fine Art Tutorials compares them to aviator sunglasses, which is a better mental image than two round holes, and it explains why so many first skulls look like surprised cartoons.
Two more checks help. The chin is generally narrower than the mouth, and the jaw should connect the cheekbones to the chin without becoming wider than the upper cranium. If your skull looks lopsided, go back to the center line and the horizontal guides and make sure the features on each side sit on the same lines.
Treat all of this as a set of construction guides rather than fixed measurements. Real skulls vary from person to person, so when you have a good reference image in front of you, let the reference win over any template.
Front, three-quarter and side views
The front view is the most familiar and the most forgiving. Use the vertical center line and mirror everything across it. Fine Art Tutorials places the eye sockets across the central guide, the nasal opening below them, the zygomatic bones beside the sockets, and the teeth along two curved rows: the upper arch and the lower arch. Those arches are why the teeth should never be a straight, flat line, even from the front.
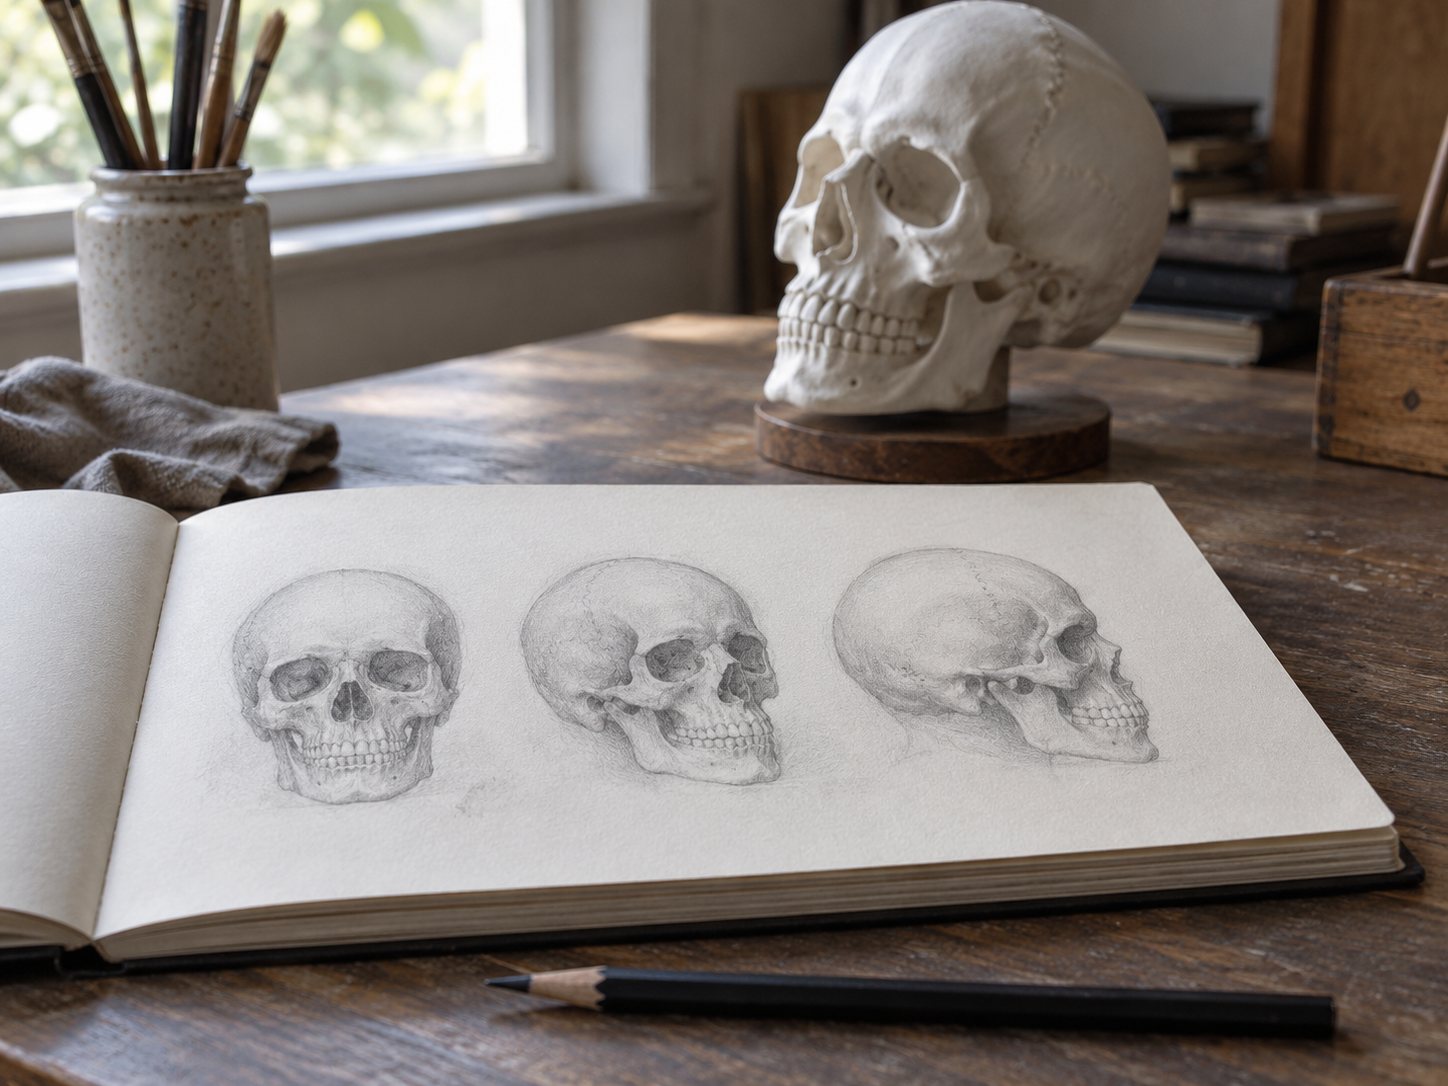
The three-quarter view, with the skull turned partway, is where most of the interest lives. In his tutorial, Ethan Nguyen shifts the center line toward the side farther from the viewer, marks the brow and the place where the front of the skull turns into the side, fills in that side plane, and then attaches the jaw. After that come the nearer and farther cheekbones, the sockets, the mouth and the teeth. The far side of the face gets narrower, and the teeth get smaller as they curve around toward the side.
The side view, or profile, needs its own construction. Lucas Peinador teaches skull proportions from the side and in three-quarter view in his lessons for Proko, working from the skull's landmarks. In profile, the silhouette has to show the rounded cranial mass, the brow, the projection of the nose area, the cheekbone, the angle of the jaw, the chin and the back of the cranium. A common trap is drawing a front-view oval and simply turning the features sideways inside it. Build the profile from its own planes instead, and the skull will look like it has depth.
Shading a realistic skull
Shading is what turns a line drawing into something that looks solid enough to pick up. Start by choosing one light source, and keep every shadow consistent with it.
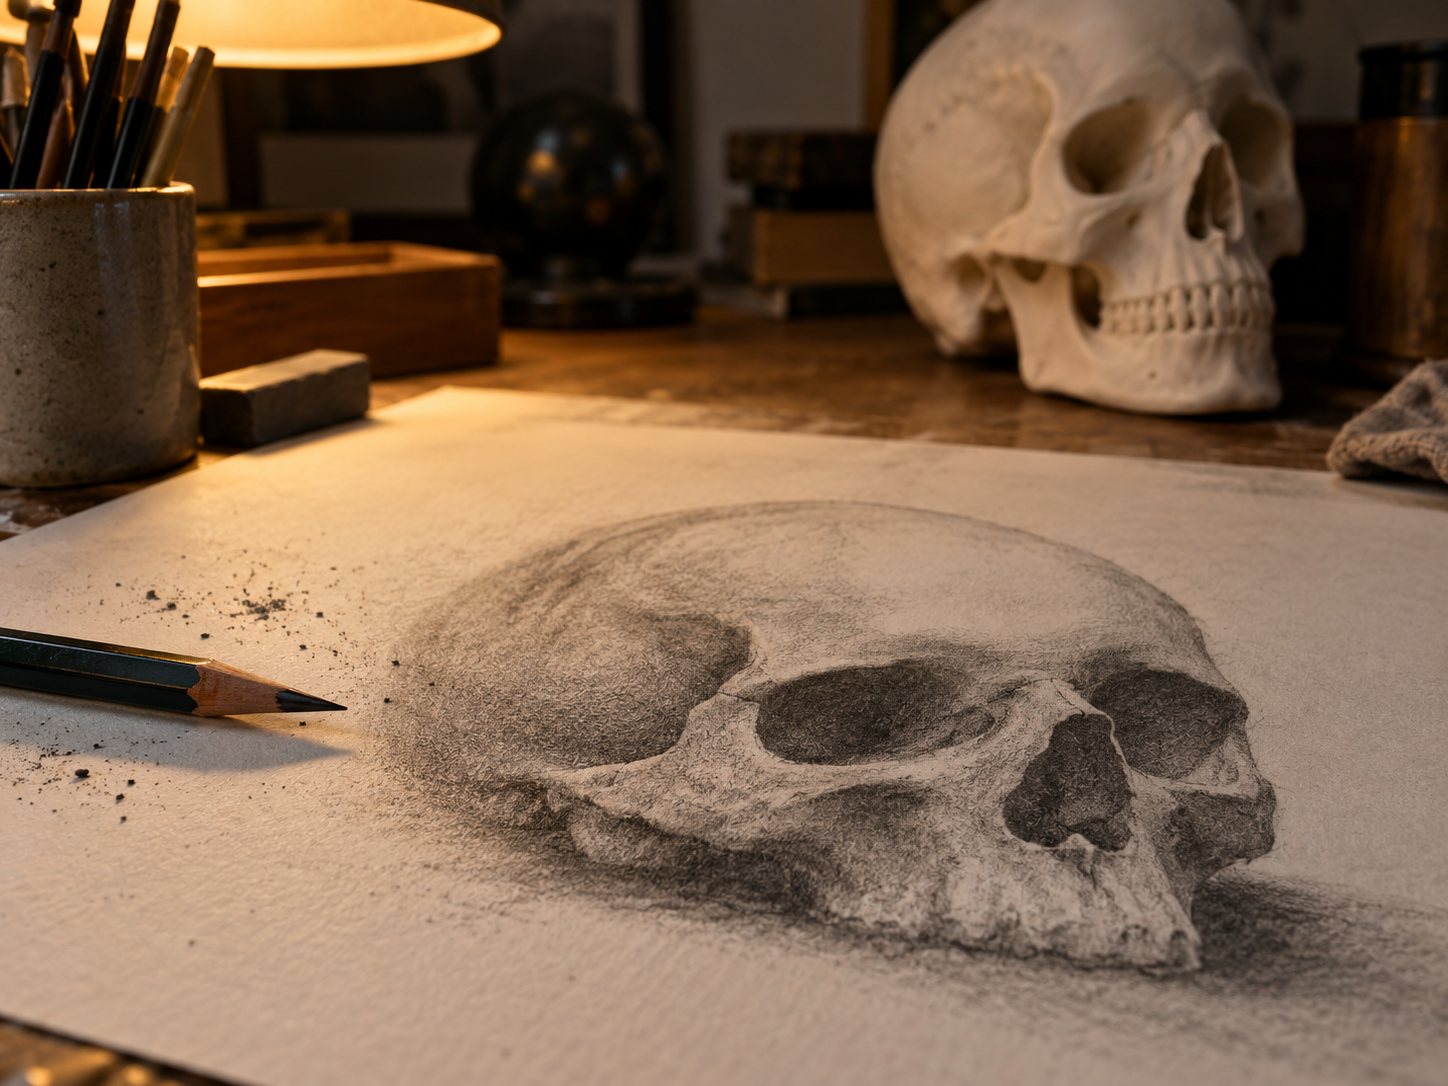
Ethan Nguyen begins with the darkest areas: inside the eye sockets, the nasal opening and around the jaw. Then he adds halftones with a lighter pencil, darkens the small gaps between the teeth, and adds a cast shadow on the surface under the skull so it does not float. Fine Art Tutorials works around the skull area by area, shading the tooth roots, the jaw and its rising back edge (the ramus), the nasal cavity, the zygomatic bones, the eye sockets, the cranium and the mandible.
Both instructors handle edges the same way. On the rounded cranium, the change from light to shadow is soft and gradual. Around deep openings like the sockets, and where one bone overlaps another, the edges are sharper. That contrast between soft and crisp transitions is a large part of what makes a skull drawing look realistic.
If you want to know why one skull looks real and another looks flat, it usually comes down to the same short list. The cranium reads as a rounded mass, the sockets and nasal cavity have depth, the cheekbones and jaw show clear changes of plane, and the teeth follow their curved arches with perspective instead of sitting in a flat, identical row.
Simplifying for cartoons, sugar skulls and tattoo flash
Plenty of skull drawings never aim for realism, and they do not need to. Stylized skulls are design choices rather than anatomy lessons, but the construction underneath still helps them read clearly.
A cartoon skull keeps the recognizable silhouette and turns the cranium, sockets, nose and teeth into bold, simple shapes. You can exaggerate the size of the sockets or round off the jaw, and it will still read as a skull as long as the overall outline holds.
A sugar-skull design is an ornamental calavera tied to Mexican Día de Muertos traditions. It usually starts from a clear, readable skull base and adds bright color and repeated floral or geometric decoration. The candy skulls behind the style have a long history. Mexico's INBAL traces the alfeñique sugar-work tradition back to the sixteenth century, with amaranth and honey used before sugar became central. In March 2024, an INBAL exhibition called Azúcares sacras showed three large sugar skulls once owned by Diego Rivera, reportedly bought at Mexico City's Mercado de la Merced between 1956 and 1957. If your drawing is for an altar or a classroom Día de Muertos project, the stories of sugar skulls and the many meanings of the word calavera are worth reading first, because this is a living tradition that families still keep.
A tattoo-flash skull reduces the form to a strong silhouette, limited linework, controlled black areas and clear negative space, so the design stays legible at a small size on skin. If you are sketching a tattoo idea, the meanings behind a skull tattoo and a sugar skull tattoo are a good next read before you take a drawing to an artist.
Beginner mistakes to watch for
The instructors behind these steps point to the same handful of slips, and most of them are easy to fix once you know to look.
- Pressing too hard on construction lines. They should be faint enough to erase.
- Skipping the center and horizontal guides. Without them, features drift and the skull looks lopsided.
- Drawing the eye sockets as round holes. They are large, rounded but angular shapes.
- Giving every tooth the same shape. Teeth change size and spacing as they curve around the arch.
- Losing the curved tooth arches. A straight row of teeth flattens the whole face.
- Ignoring the jaw and cheekbone planes. These changes of direction give the skull its structure.
- Shading without one light source. Mixed shadows make the form look confused.
For the teeth, Ethan Nguyen suggests dividing the block into sections rather than drawing each tooth at random. It keeps the spacing even and makes the curve easier to follow.
Quick skull drawing quiz
Answer every question to check.
Frequently asked questions
These are the questions people ask most often when they sit down to draw their first skull.
How do you draw an easy skull?
Start with a light circle or oval for the cranium, add a vertical center line and horizontal guides, and attach the jaw below. Then add two large eye sockets, a triangular nasal opening, cheekbones and a curved block for the teeth, and darken the hollows. A front view is the simplest place to begin.
Is it hard to draw a skull?
It is approachable once you break it into construction shapes, though a believable result takes attention to proportions, the jaw, the sockets, the teeth and perspective. A simple front-view skull is much easier than a realistic three-quarter or side view, so many people start there and turn the skull later.
What makes a skull drawing look realistic?
Accurate large forms and consistent light make a skull look real. The cranium should read as a rounded mass, the sockets and nasal cavity need depth, the cheekbones and jaw need clear plane changes, and the teeth should follow curved arches rather than forming a flat row.
Why does my skull drawing look lopsided?
Usually the features on each side are not sitting on the same guide lines. Redraw the vertical center line, check that the sockets, nasal opening and jaw line up across it, and mirror the shapes from one side to the other.
Where to go next
Once you can draw a skull, it is fun to see how artists have handled the same shapes over the centuries, and our page on famous skull art is a good place to start. For a Día de Muertos project, read up on sugar skulls before you add color. And if you teach the art class where these skulls get drawn, our Teacher skull tee shows an engraved skull in reading glasses on a stack of books, with GRADED TO THE BONE across the bottom.